Tiny Wing Introduction
Welcome to our Tech blog.
Today I will introduce a tiny UAV that is easy to build and fun to fly.
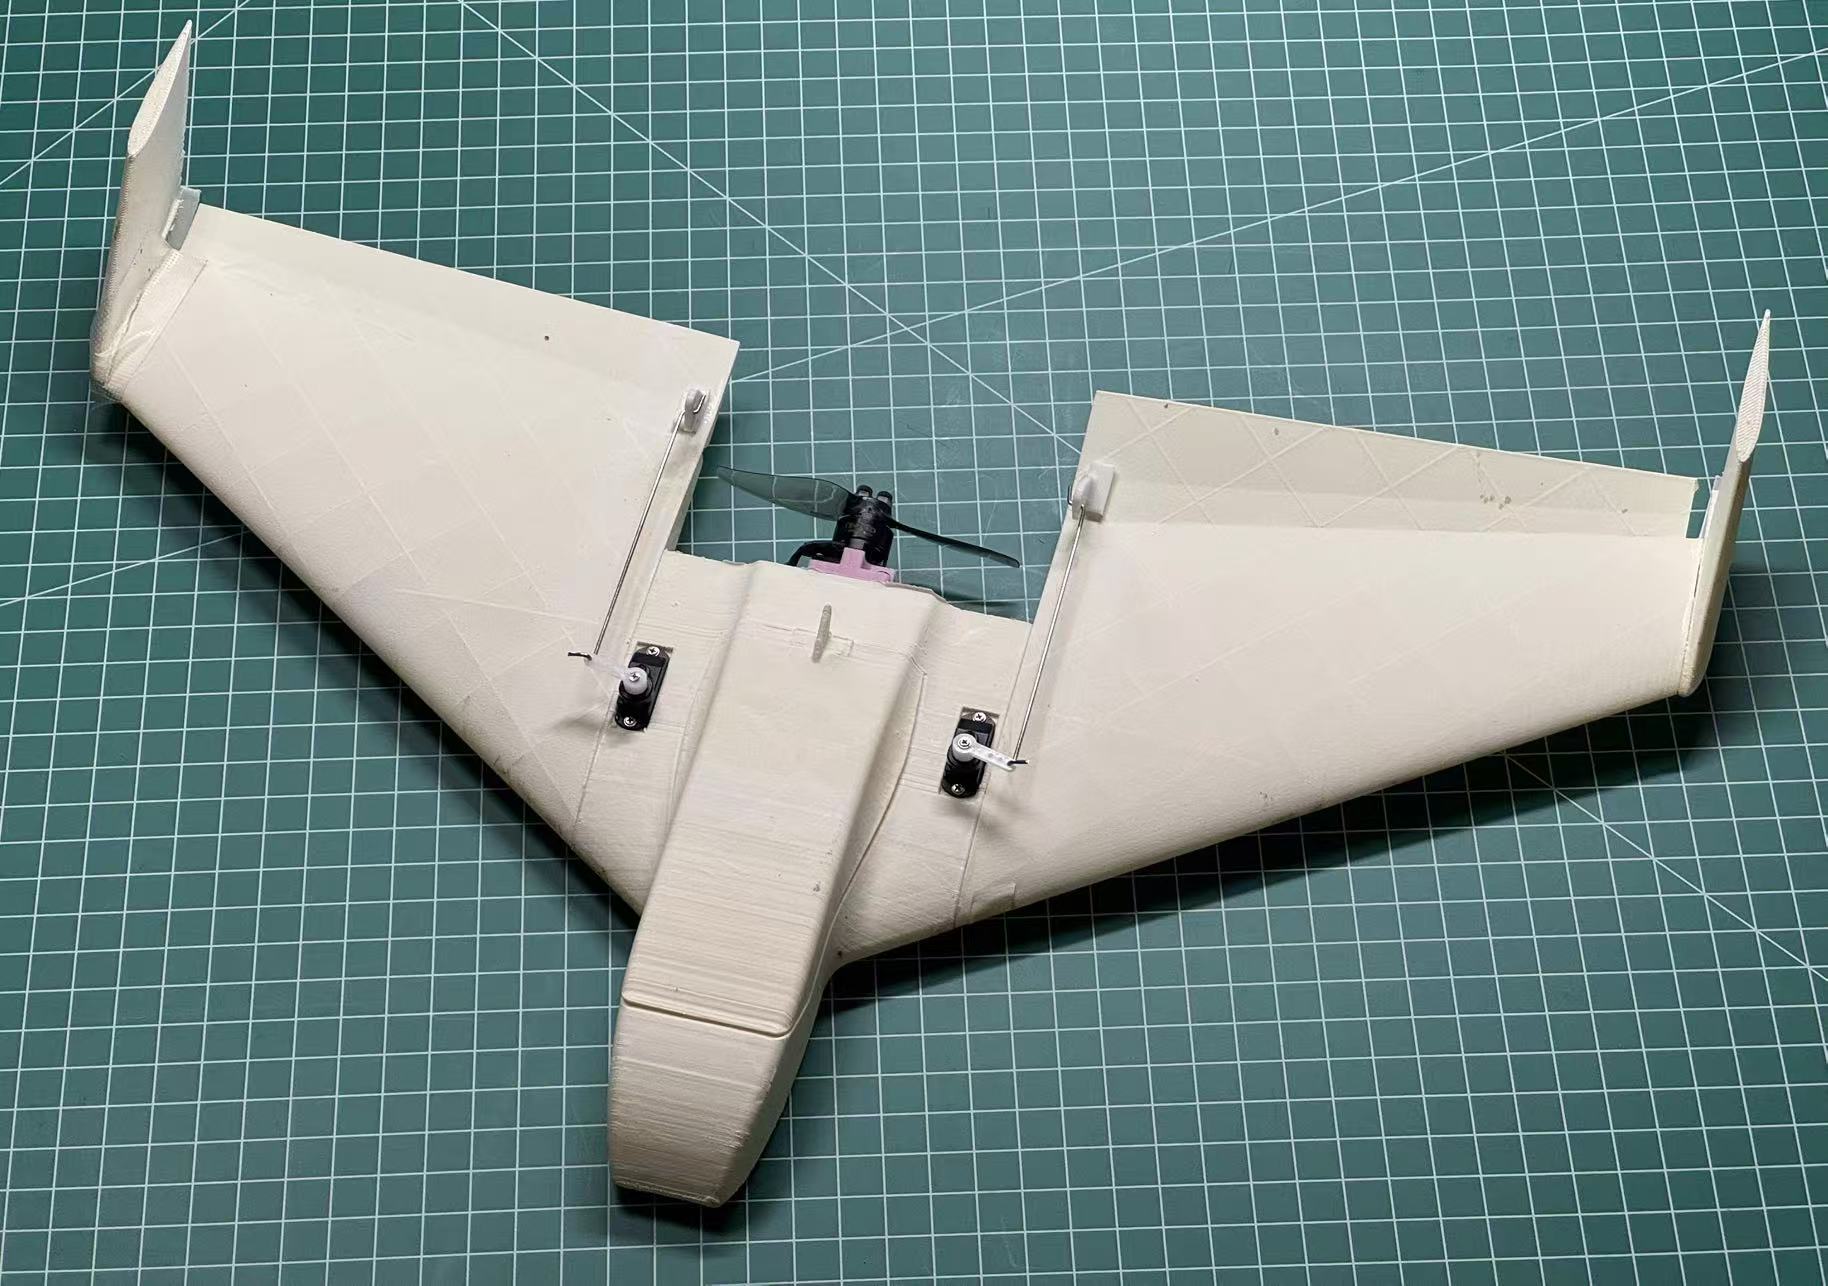
Model Information
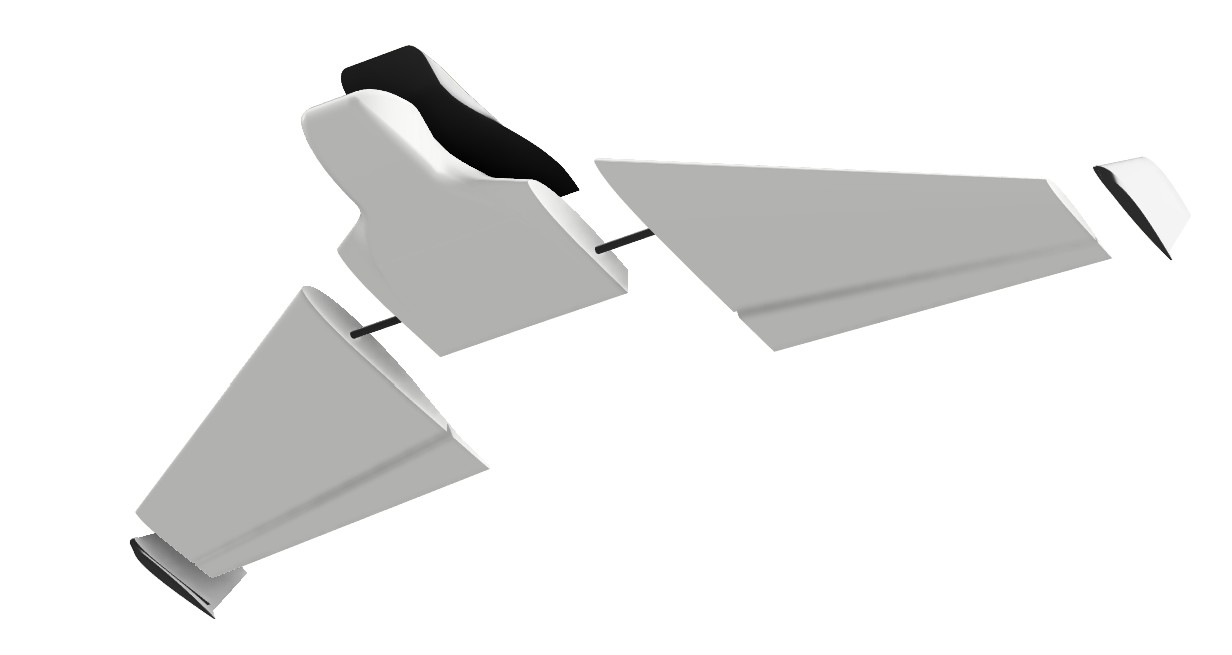
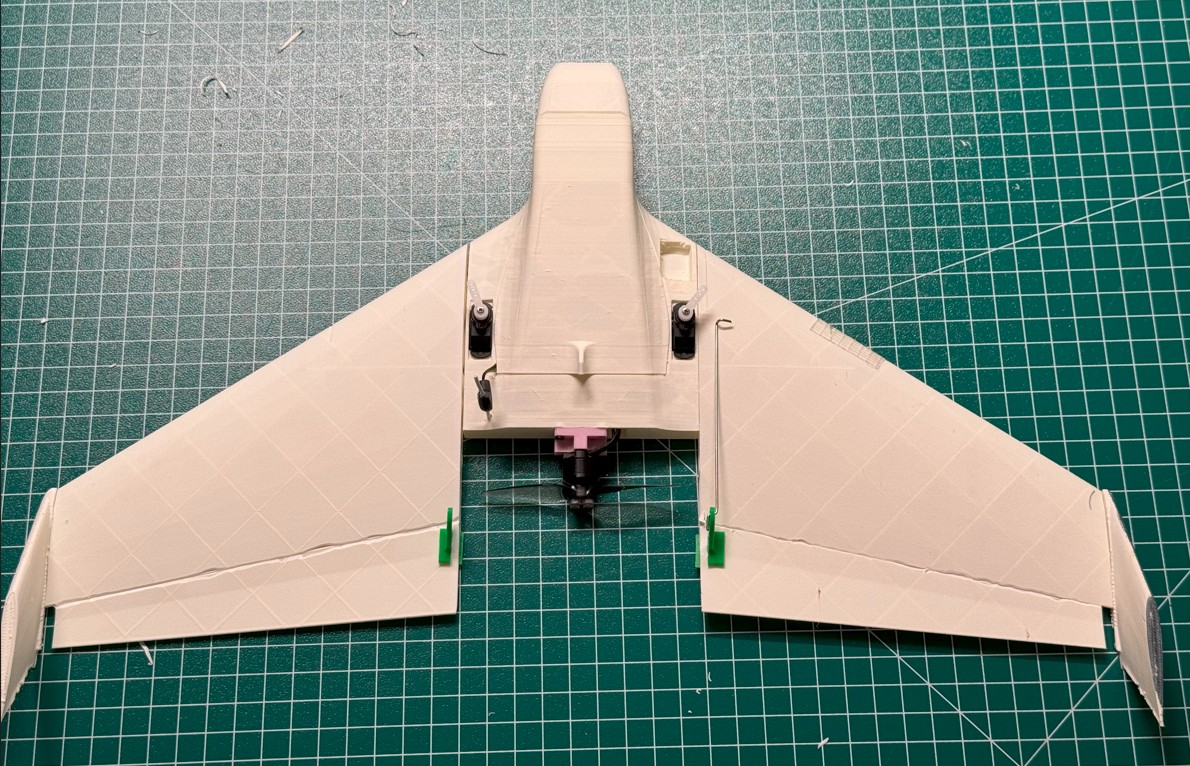
TThe Tiny Wing is a 3D-printable UAV with a 380 mm wingspan and a single pusher motor. Its name highlights the small form factor and lightweight design — just 100 g all up weight (AUW). The aerodynamics have been optimized for efficiency and agility.
Model Specifications & Performance
Wingspan: 380 mm
Wing area: 30,000 mm²
Cruise speed: 25 km/h
Typical take-off weight: 100 g
Maximum pusher propeller diameter: 3 inches
Motor: 1104 7500 KV
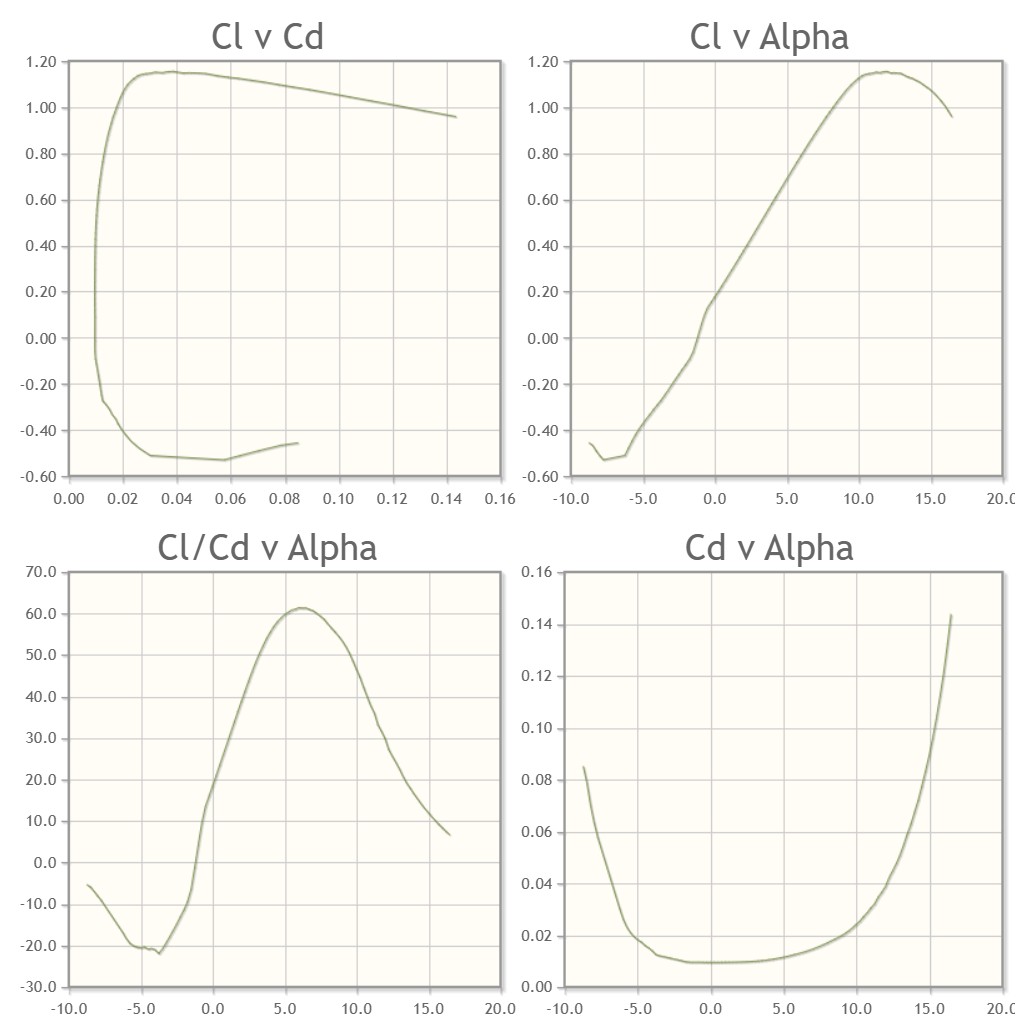
Aerodynamic Properties
- Root chord:** 140 mm
- Tip chord:** 60 mm
- Average chord:** 100 mm
- Incidence:** 0°
- Aspect ratio:** 3.8
- Max L/D:** 8.0
- Leading edge sweep:** 55.6°
- Trailing edge sweep:** 81.0°
- Airfoil:** MH60
- Plots @ Reynols = 200,000
Required Build Materials
Recommended Electronics
- ELRS receiver
- FlyingRC F4Wing Mini
- Little Bee 20A ESC
- 1104 7500 KV motor
- 2 g Servo * 2
- 2S 300 mAh LiPo
- HQ 3018 propeller
Miscellaneous
- Lightweight PLA
- 180 × 180 × 180 A1 mini printer
- Control horns and motor mount: PETG
- M2 threaded rods
- 5 × 2 mm magnets ×4 (Canopy)
- 3 × 2 × 220 mm carbon tube
- 2 * 6 mm screw *4 (Motor)
- 1.7* 6 mm screw *4 (Servo)
- 2 *8 mm screw *4 (Motor Mount)
- 1 mm pushrod (Servo pushrod)
3D Printing
Material: Lightweight PLA
Strongly recommend reading this wiki before printing LWPLA:
Bambulab rc model pringting settings
Lightweight PLA properties vary between brands, so calibration and test prints are highly recommended.
Typical Printing Settings
Wing:
- Temperature: 220–250°C
- Extrusion ratio: 0.5
- Spiral vase mode: On
- Infill: 0%
Body:
- Temperature: 220–250°C
- Extrusion ratio: 0.6
- Spiral vase mode: Off
- Zero hopping
- Avoid crossing perimeters during printing
- Infill: 5% adaptive cubic
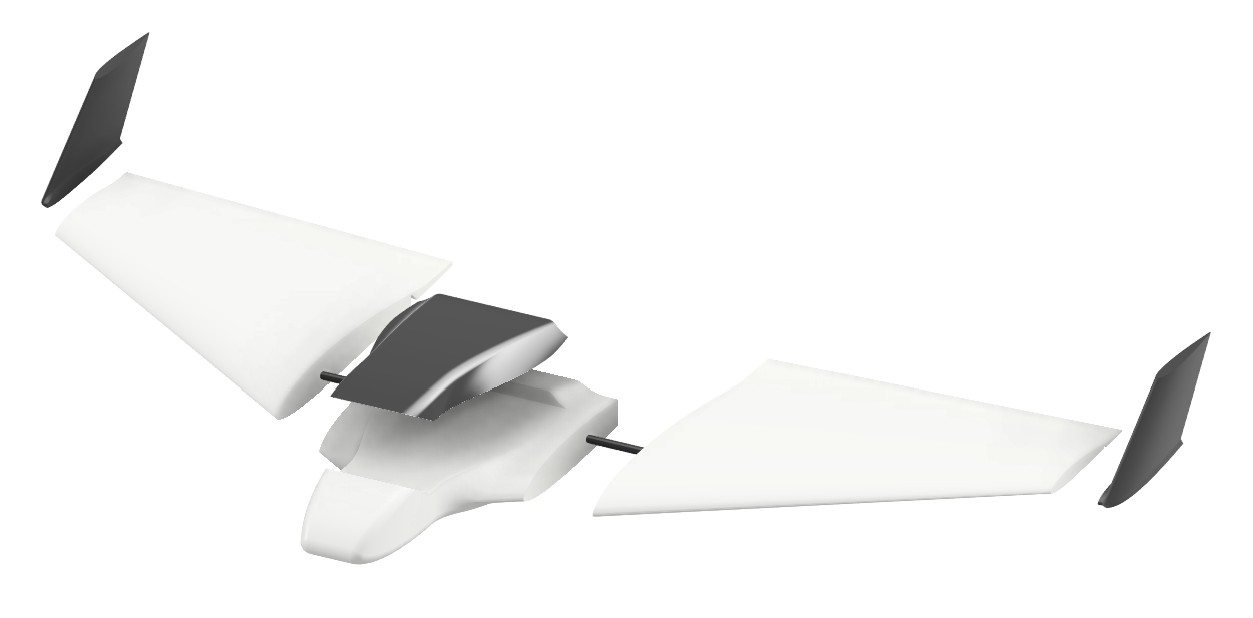
Assembly
-
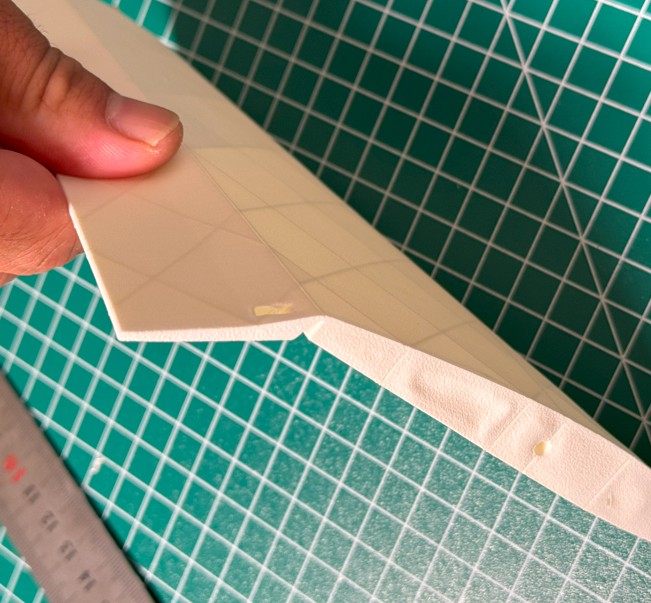
Control surfaces
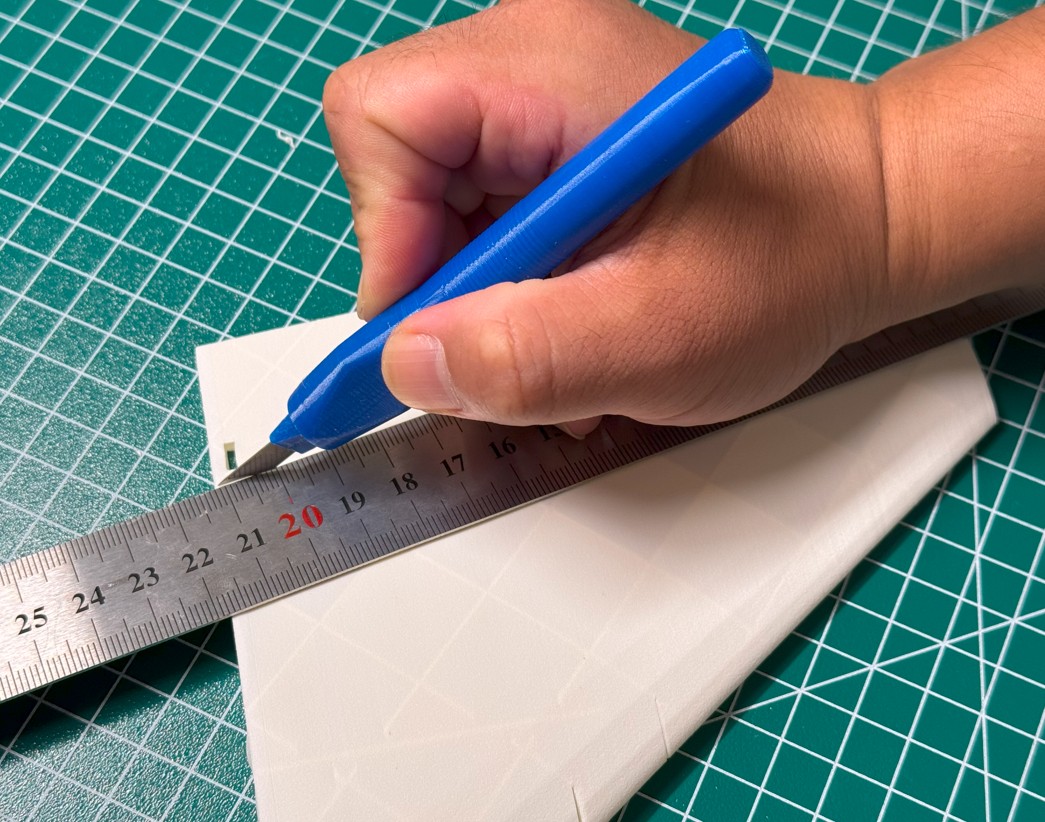
- Cut out the aileron cutouts along the trailing edge.
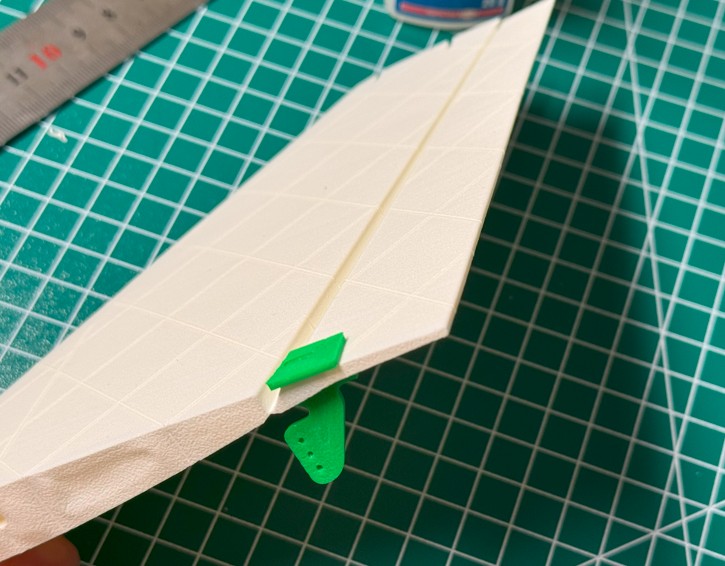
- Glue servo horn to aileron
- Cut out the aileron cutouts along the trailing edge.
-
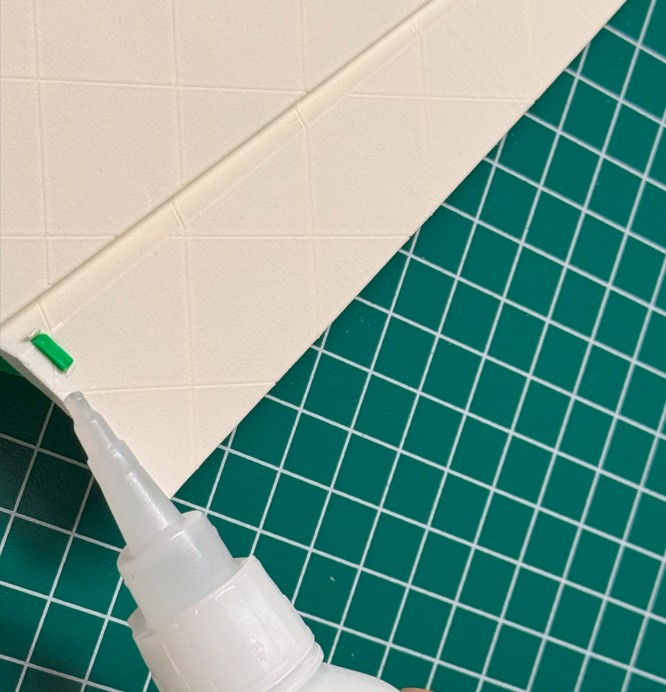
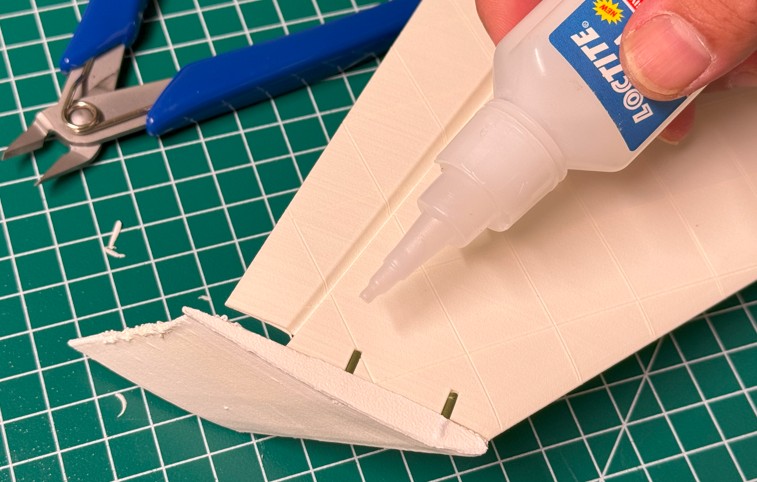
Wing Tip
- Cut 1.75mm * 10mm printing wire glue to tip of wing, and glue wing tip
-
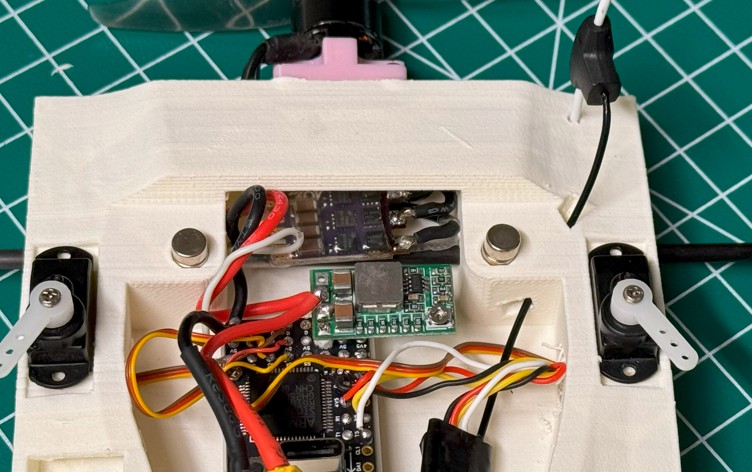
Servos and linkages
- Mount the 2 g servos inside the fuselage pockets.
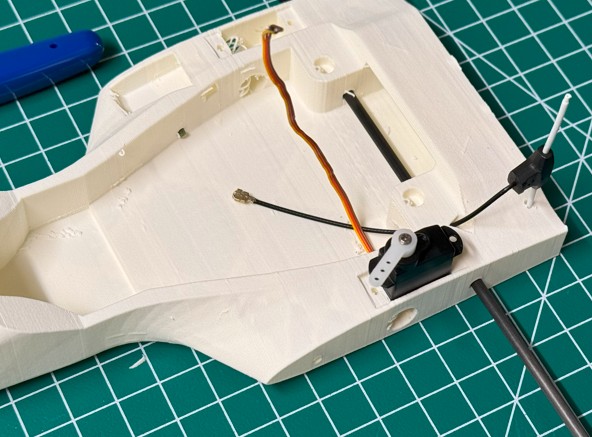
- Connect the servo arms to the control horns using steel pushrods. The pushrod is
- Check for smooth, slop-free movement.
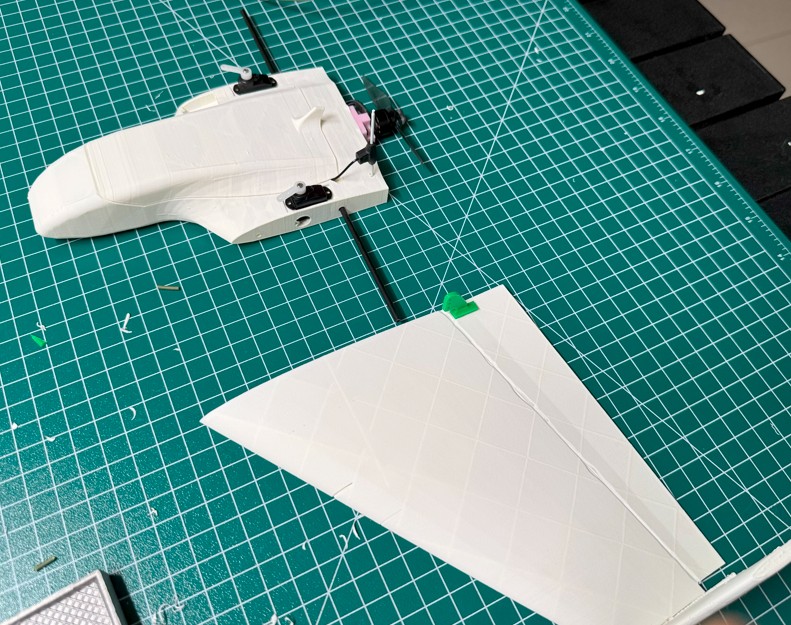
- Insert 3mm carbon tube to fuselage and connect wing
- Mount the 2 g servos inside the fuselage pockets.
-
Motor
- Mount the motor to the motor mount and attach it to the fuselage with screws.
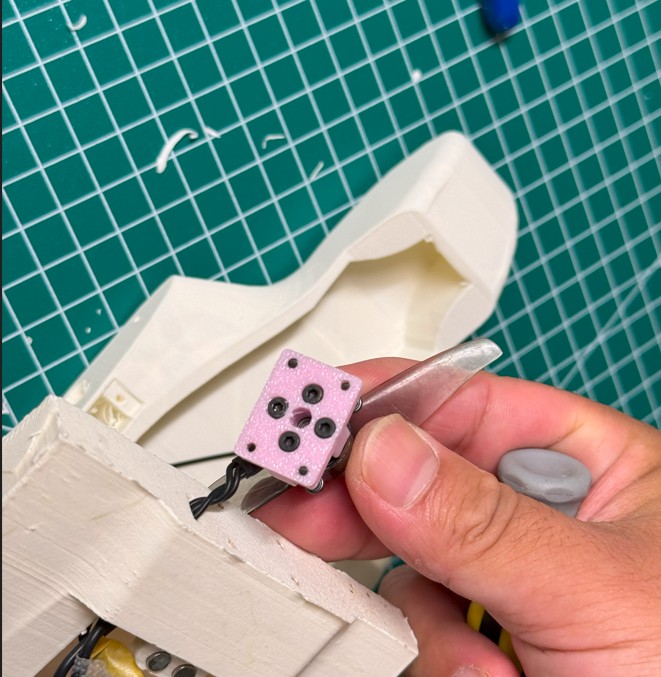
- Mount the motor to the motor mount and attach it to the fuselage with screws.
-
Canopy
- Insert 5×3 mm magnets into the canopy and fuselage slots. Drop on CA glue in before insert magnets
- Ensuring correct polarity.
- Final checks
- Verify CG (use the two dots under the fuselage as reference). For the maiden flight, it’s recommended to keep the CG slightly nose-heavy.
- Ensure the ailerons move freely and in the correct direction.
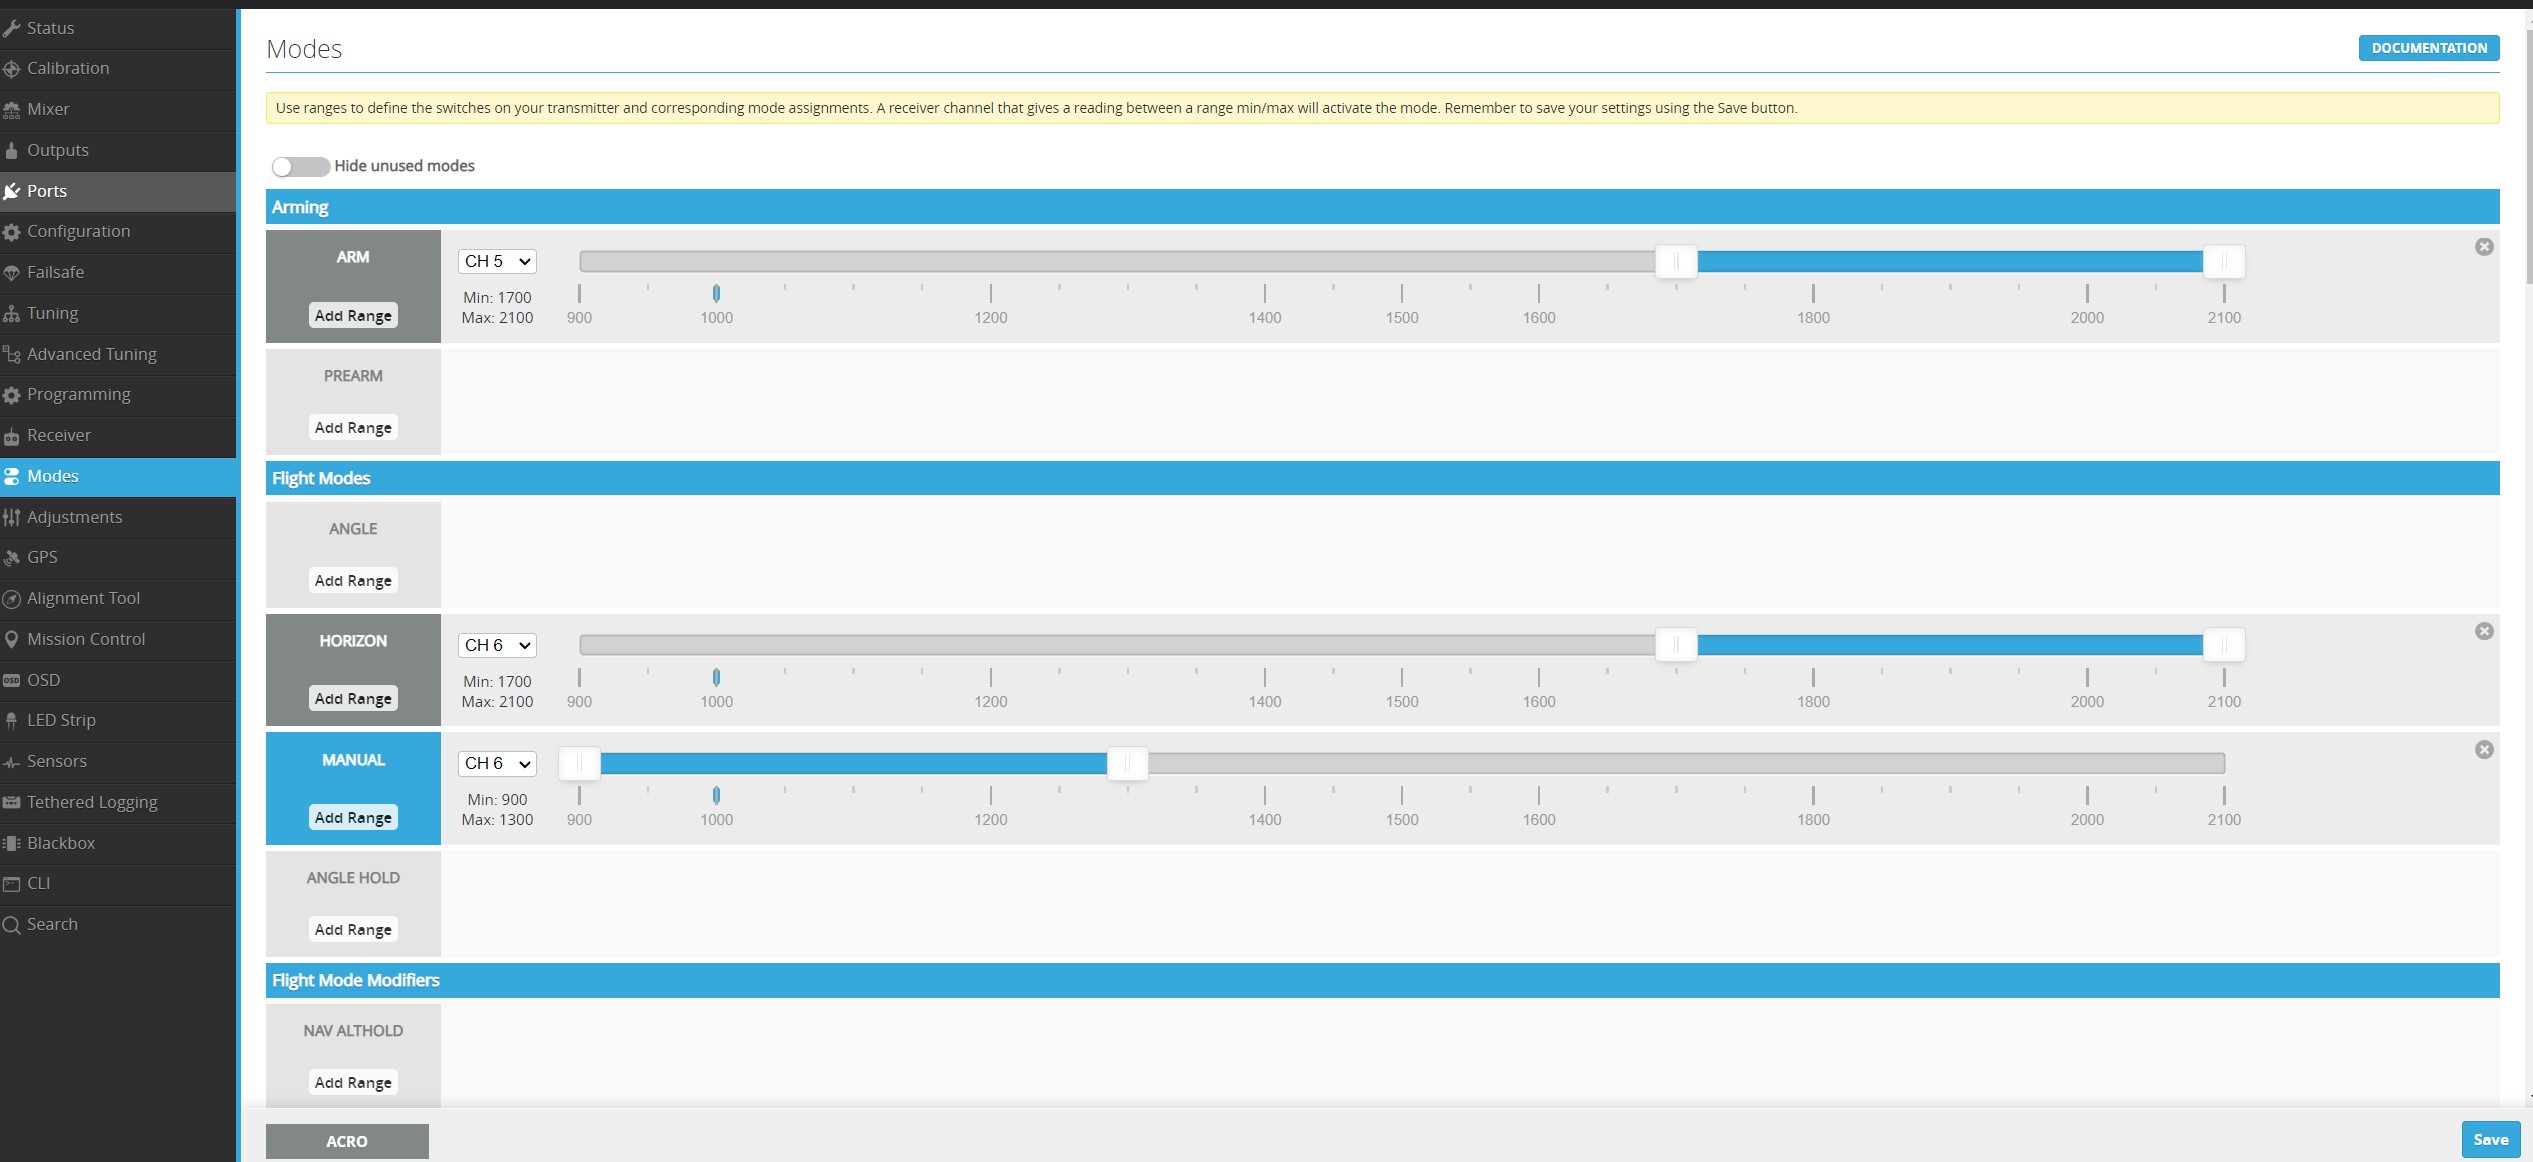
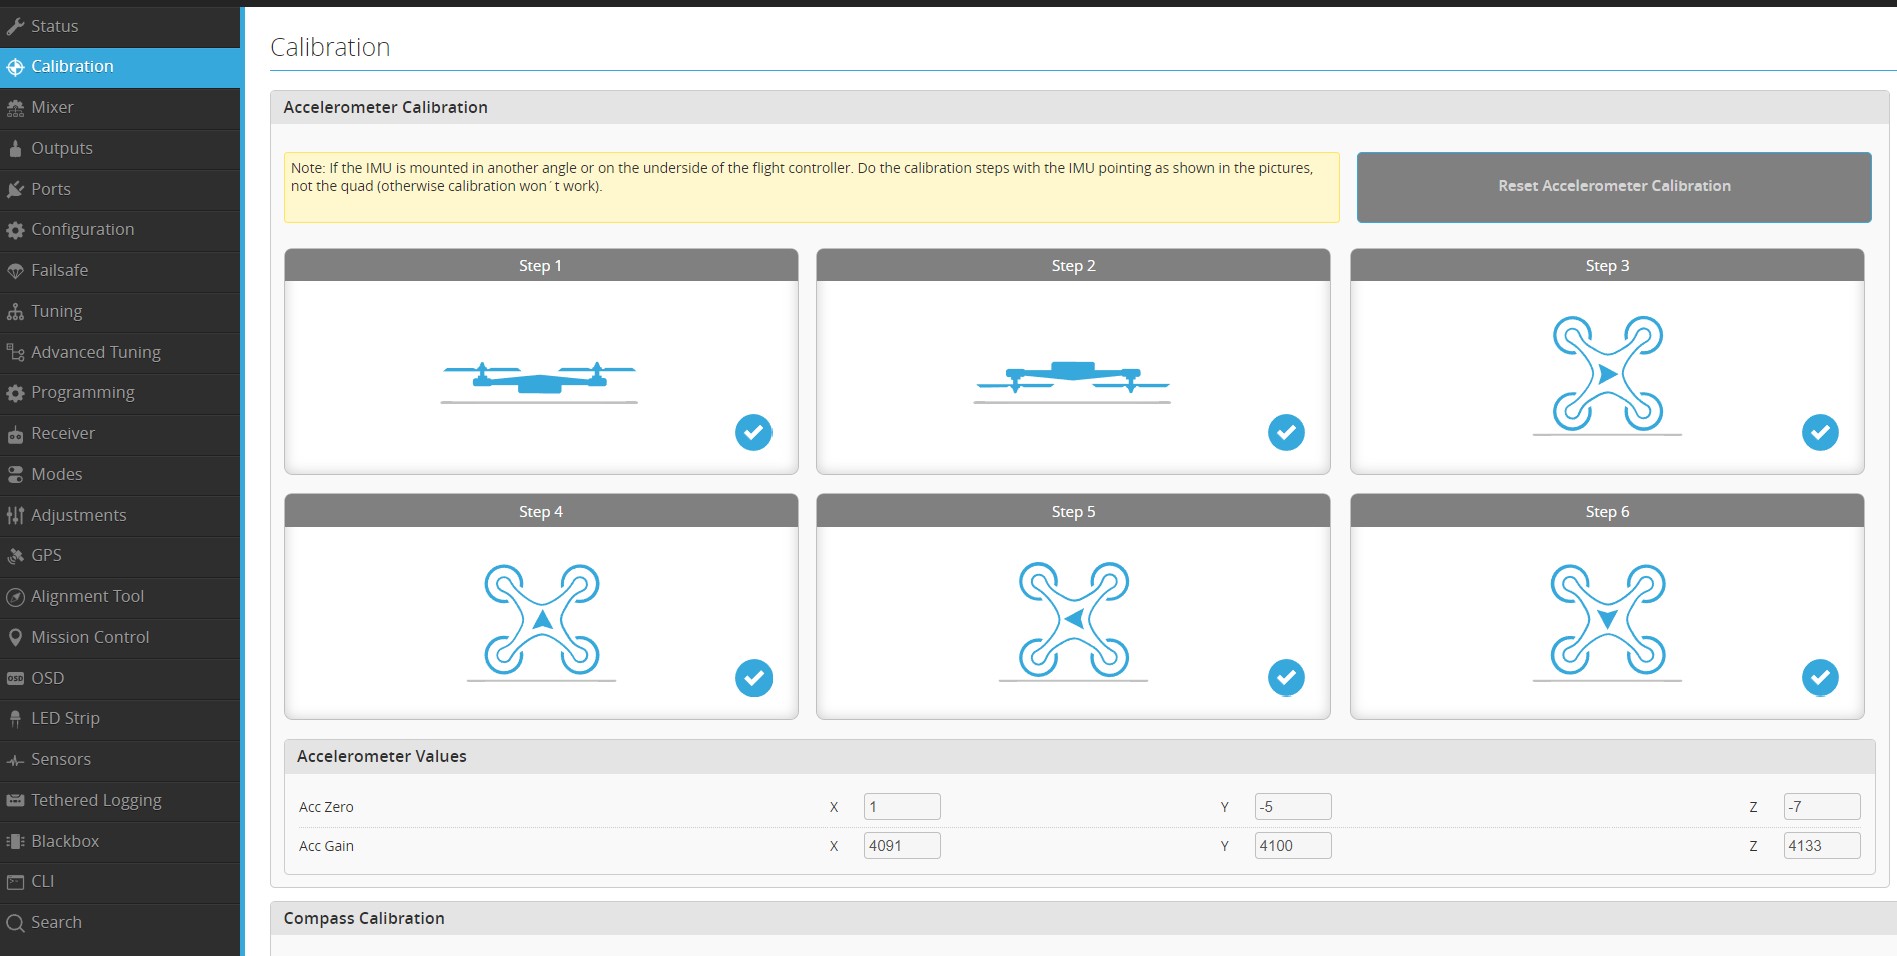
FC setting
iNav basic setting
Based on Flying RC F405 mini wing
-
Calibartion gyro
-
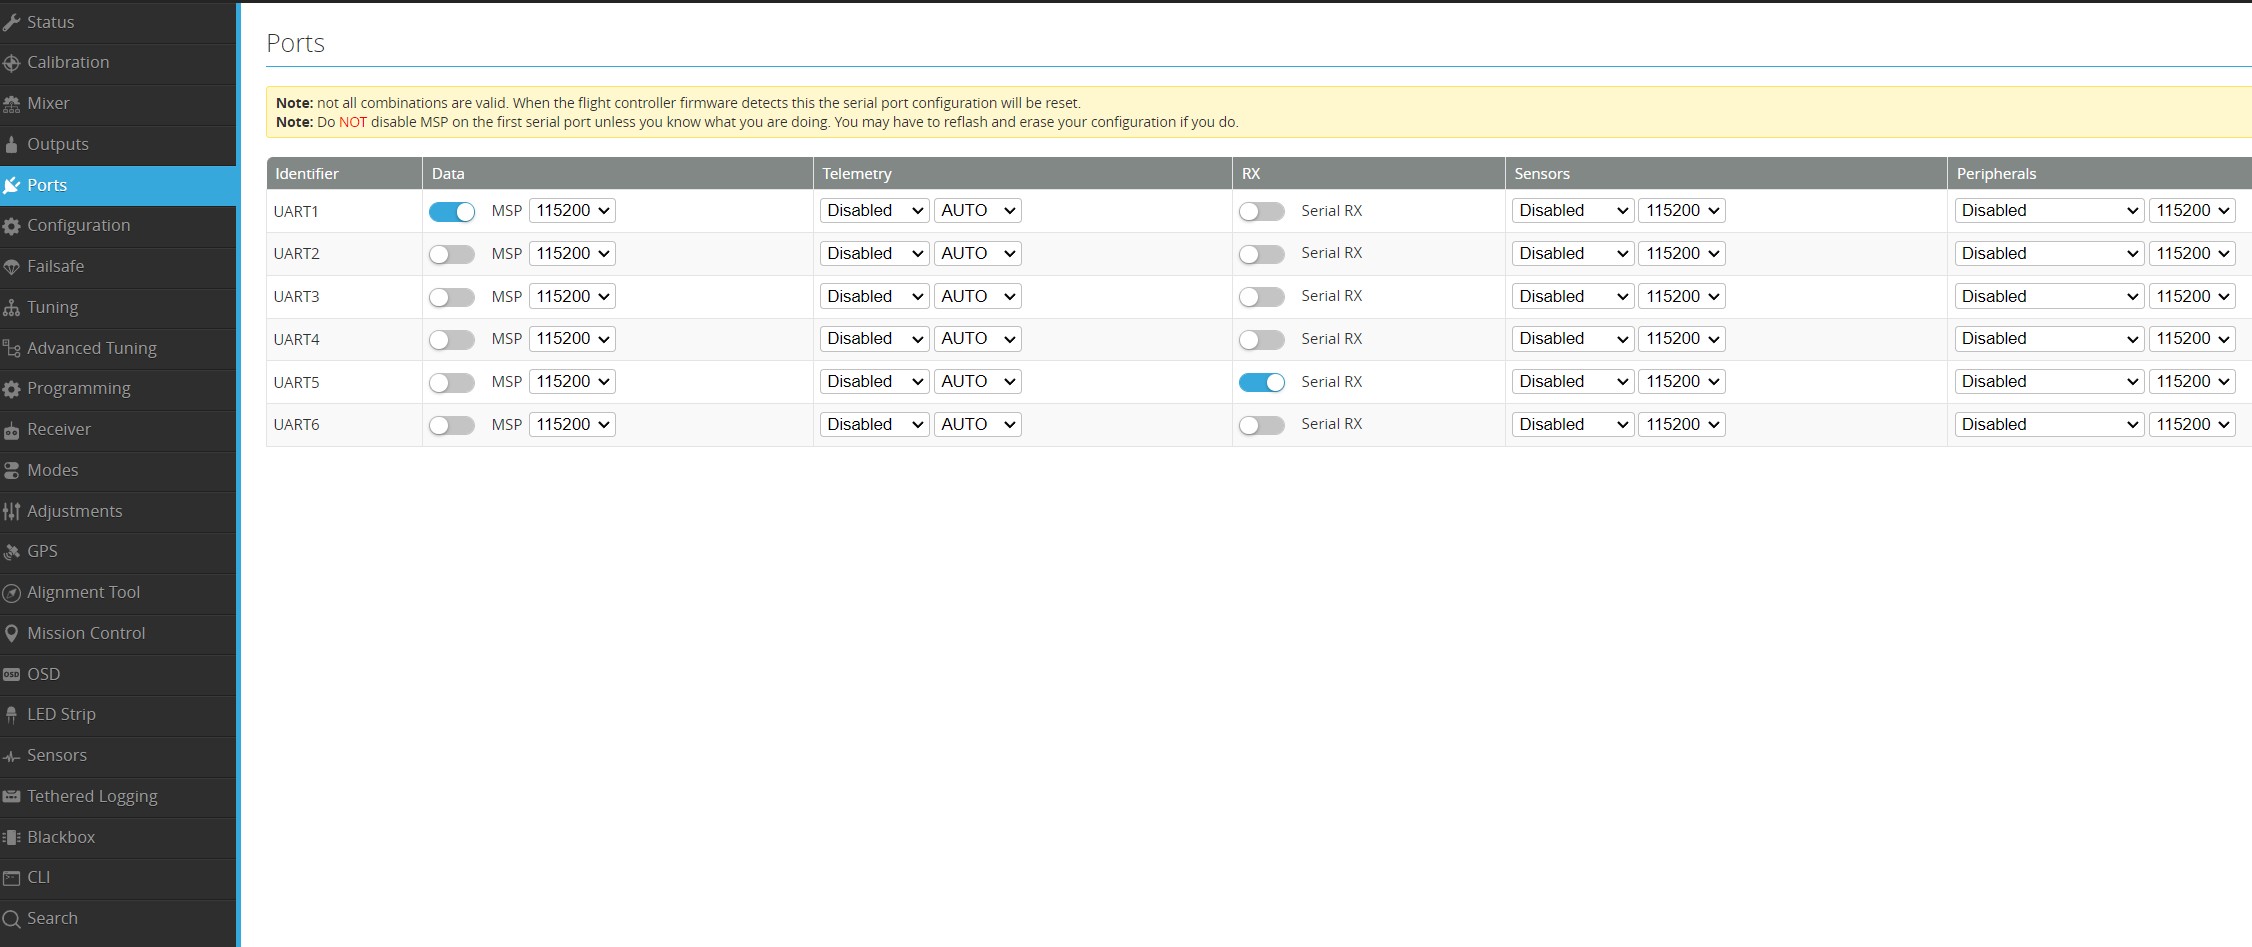
Setting ports
-
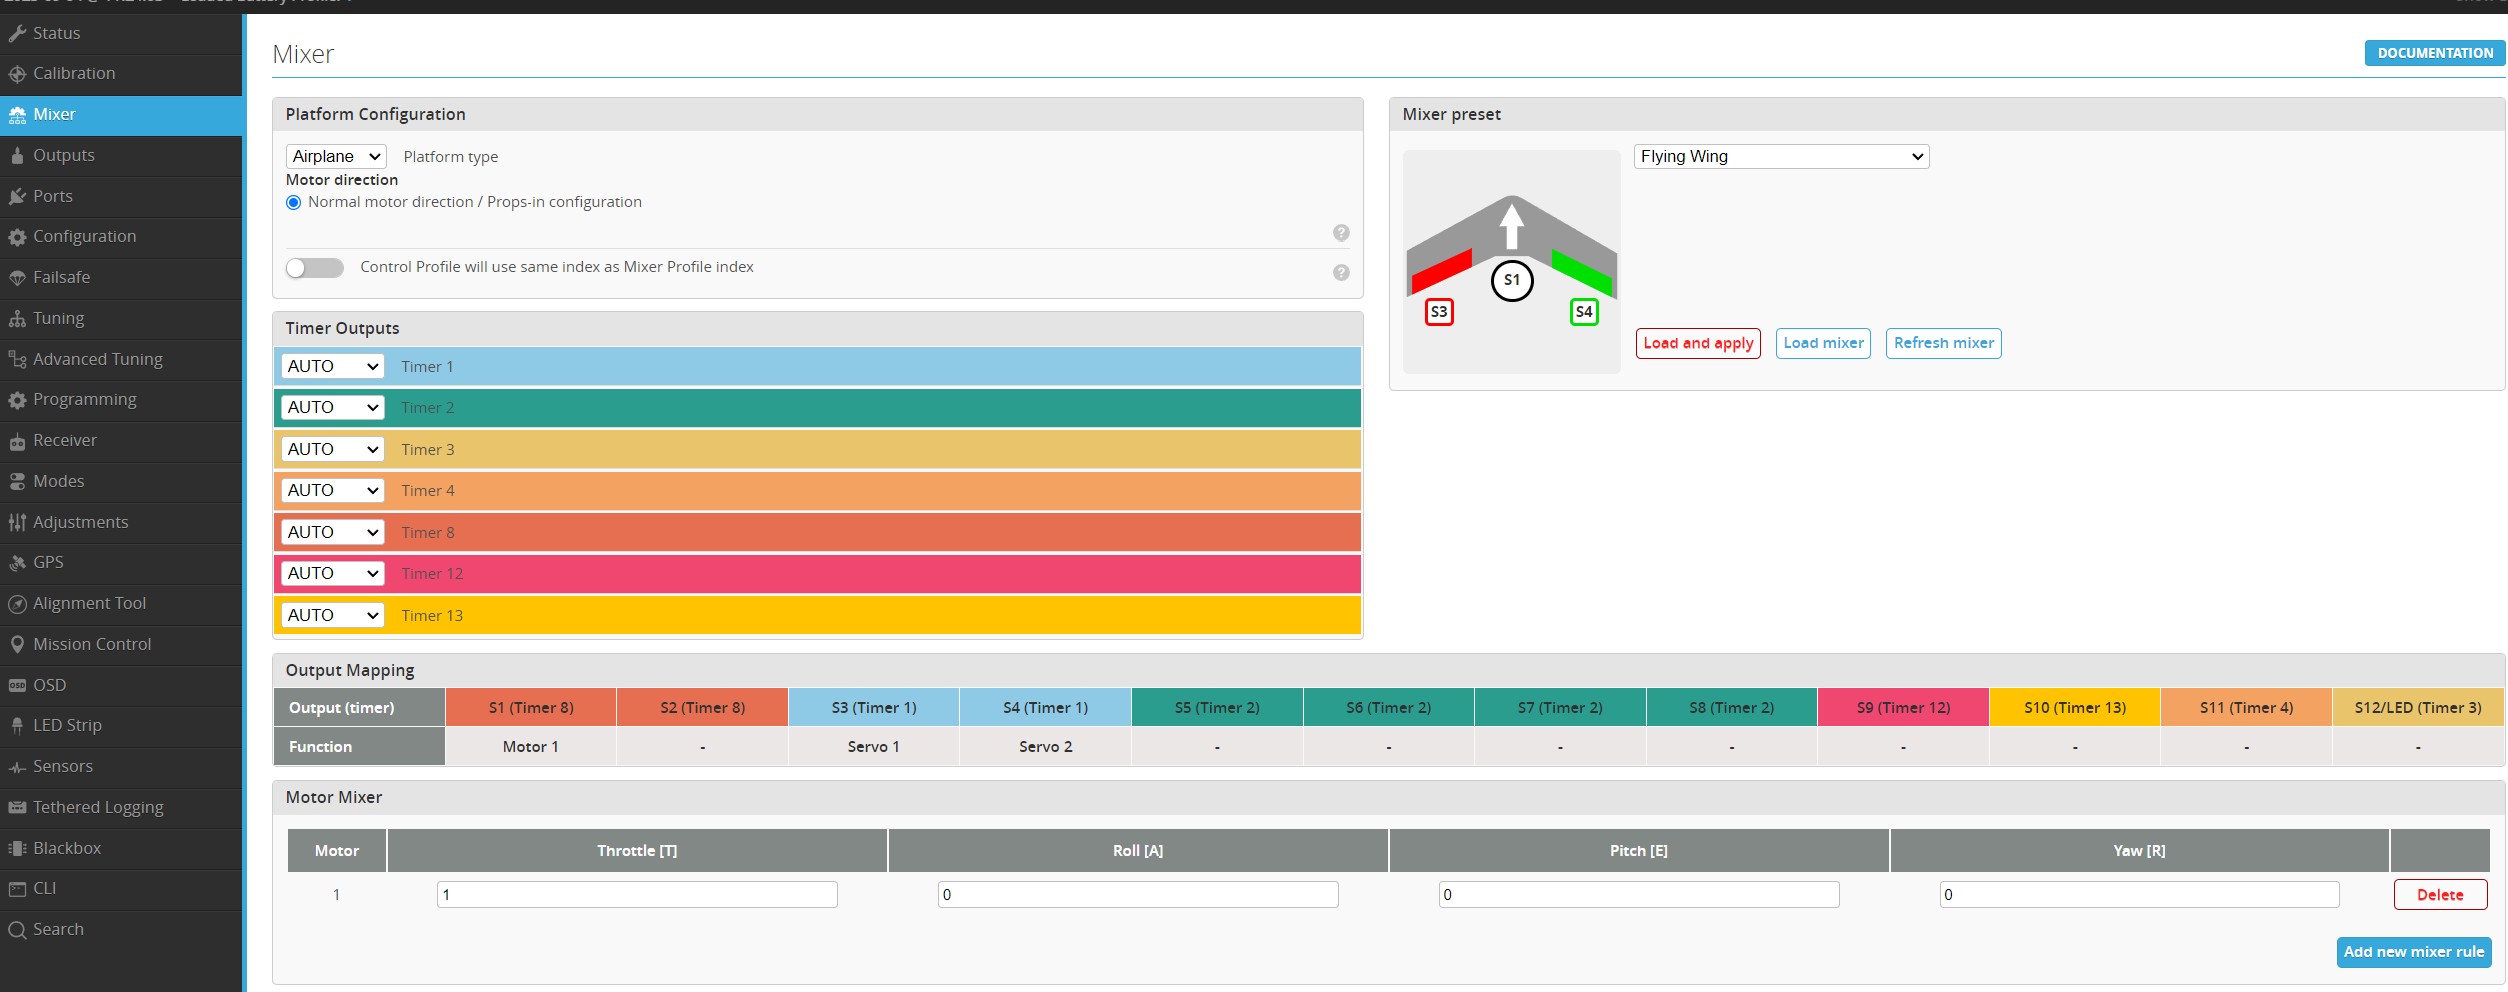
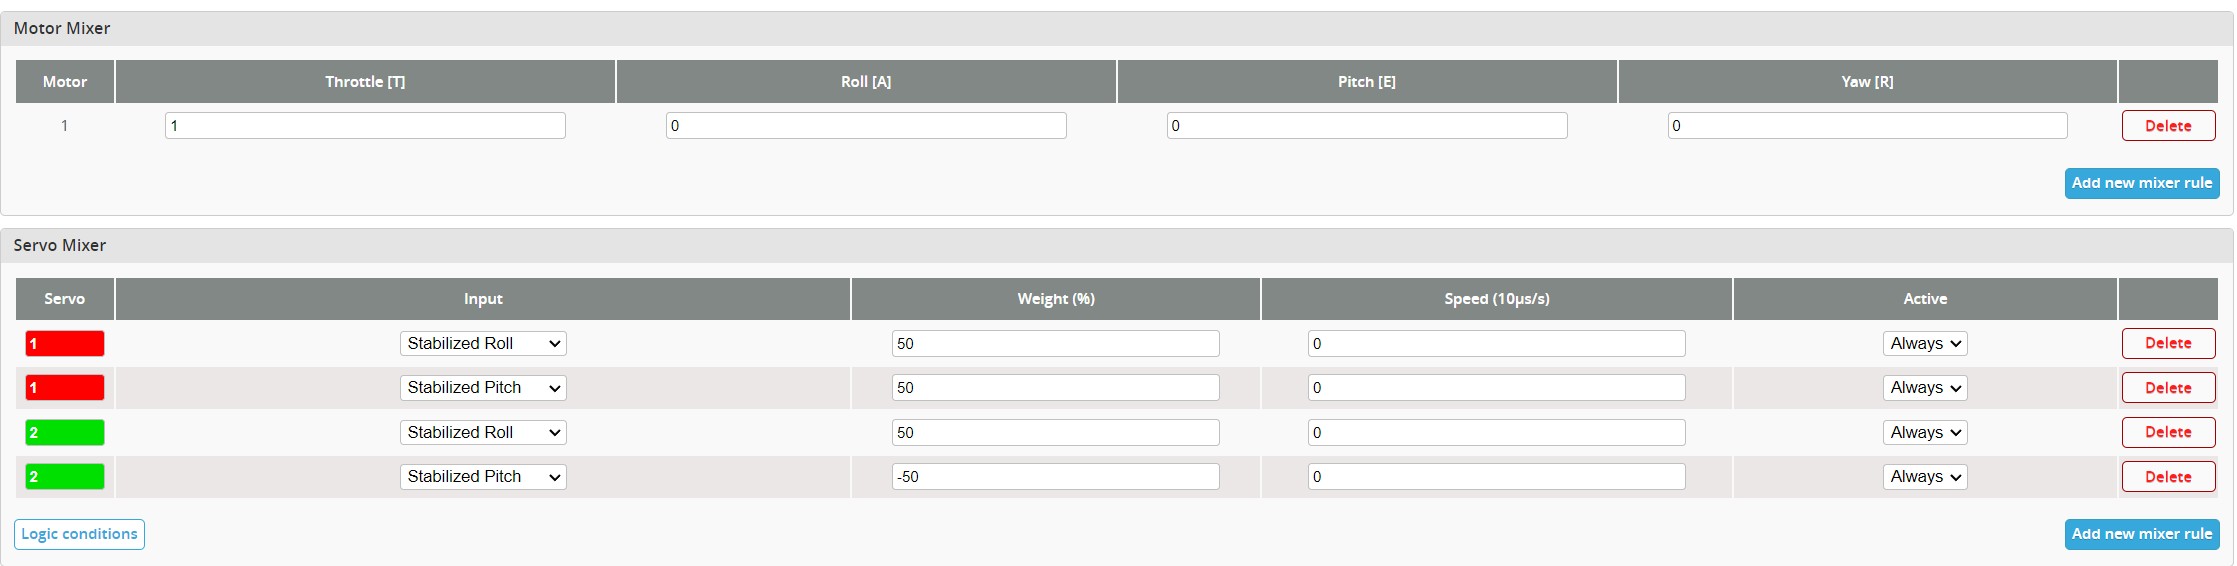
Mix setting Flying wing use aileron mix
-
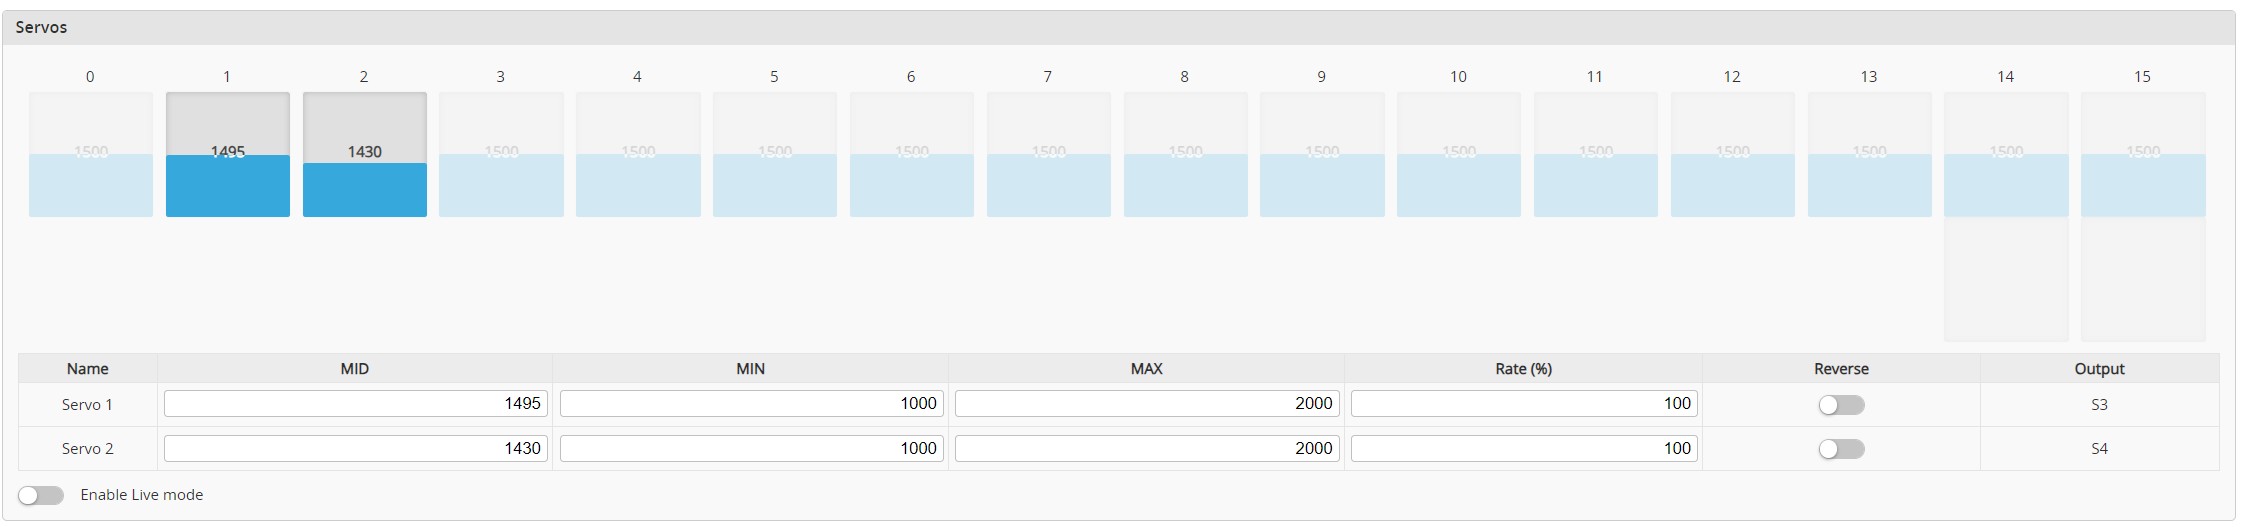
Servo and ESC Enable motor and servo output
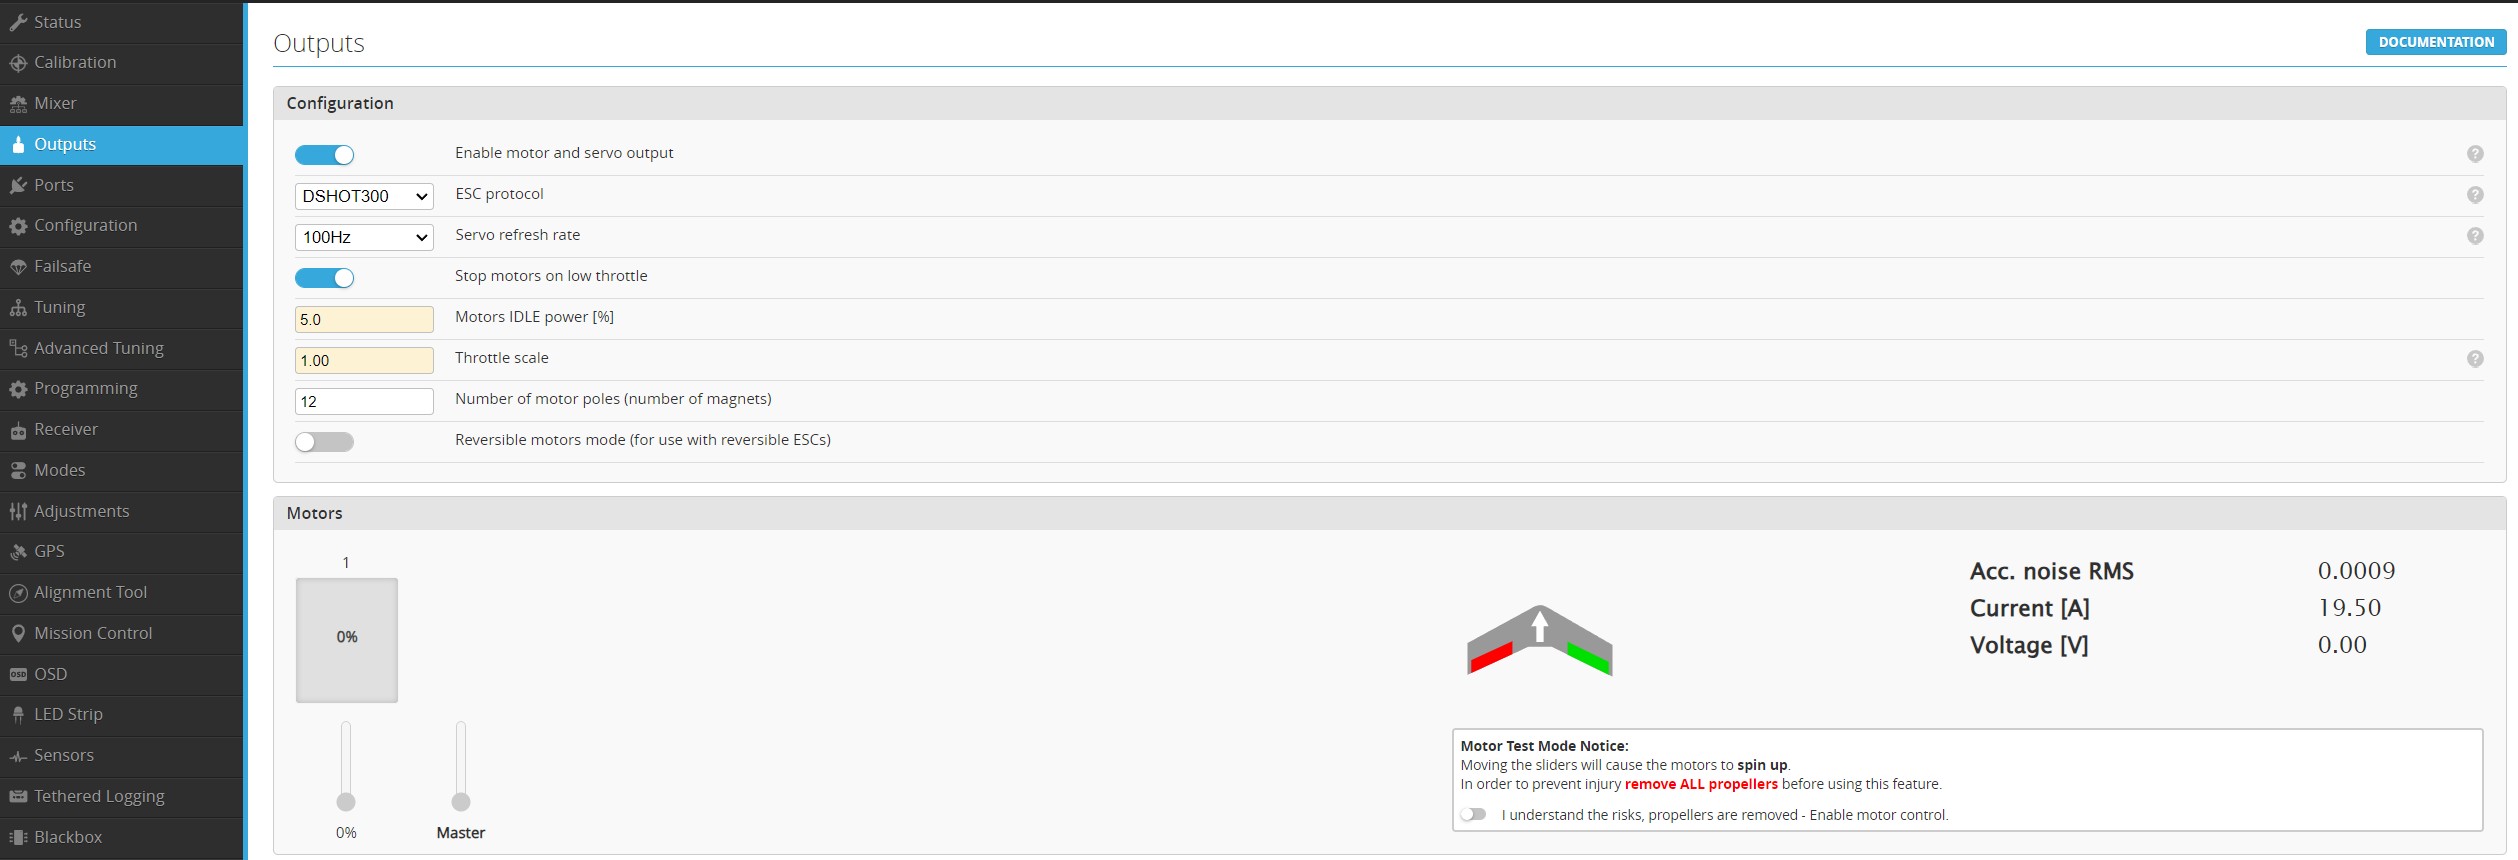 Servo trim by setting MID PWM value
 -
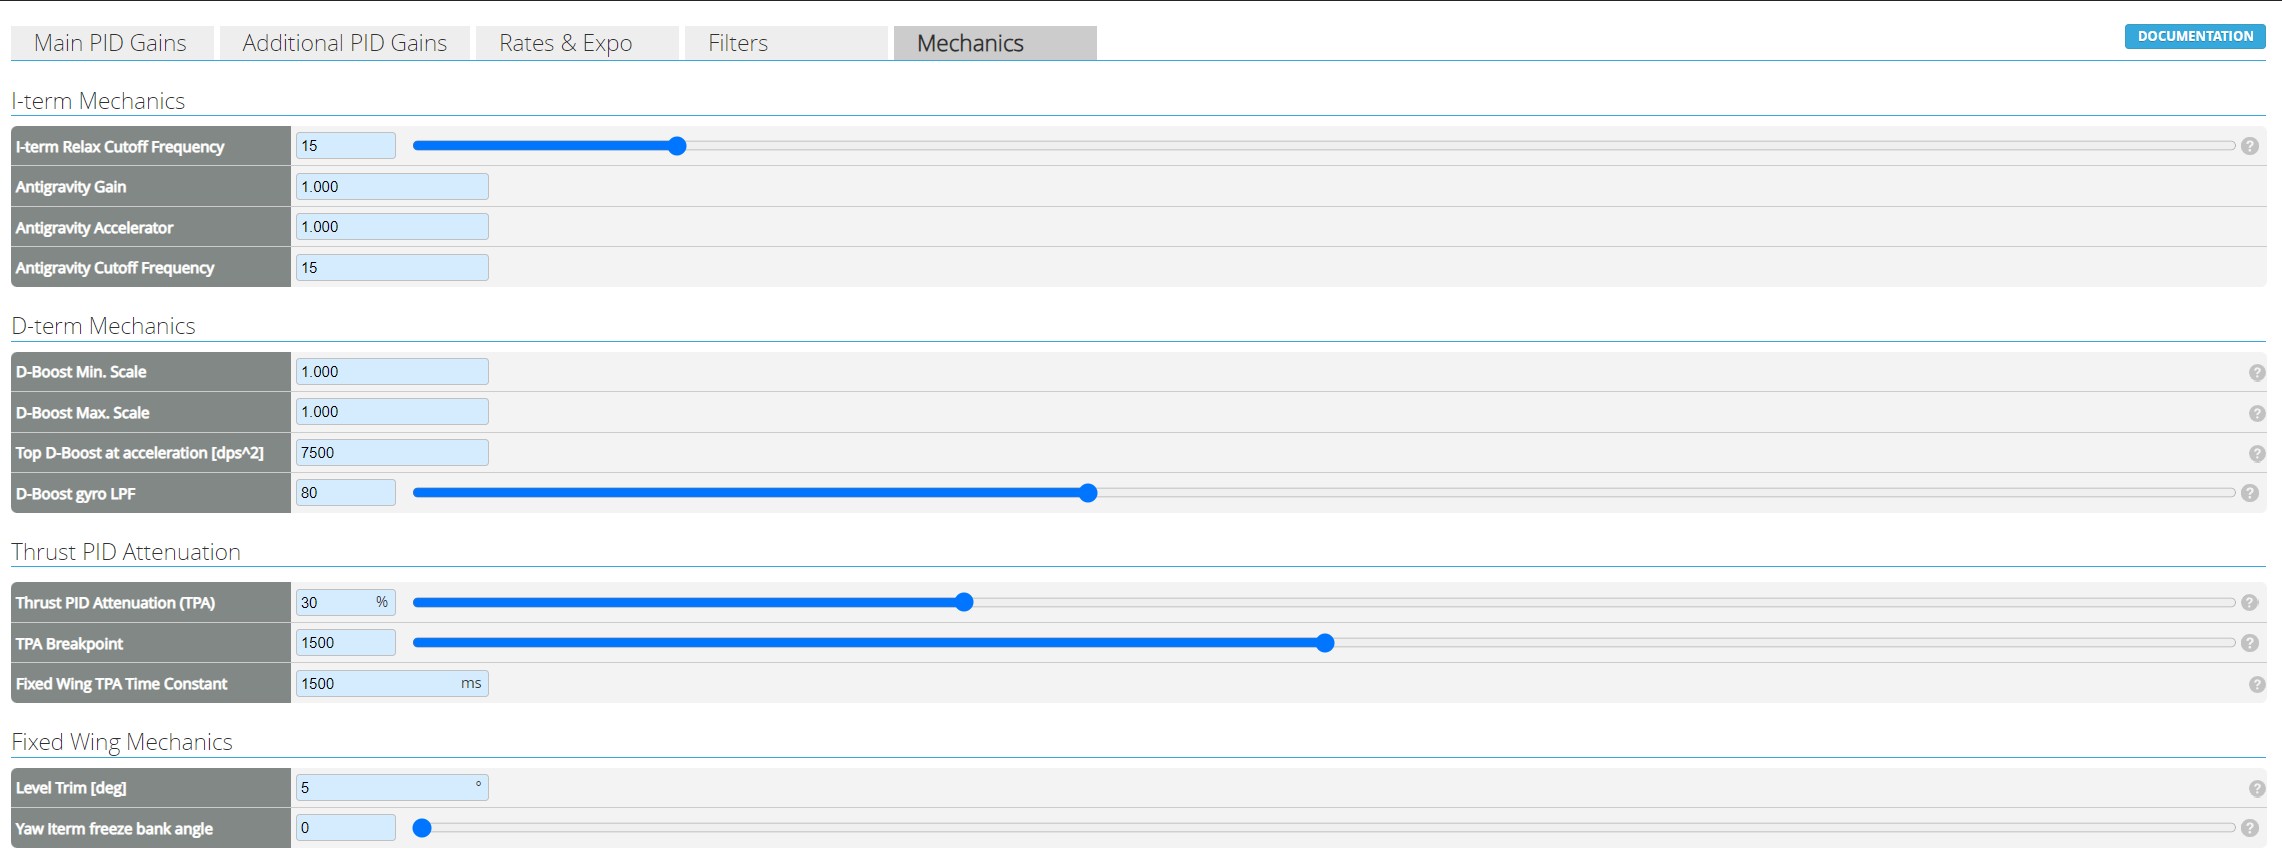
Basic tunning PID:

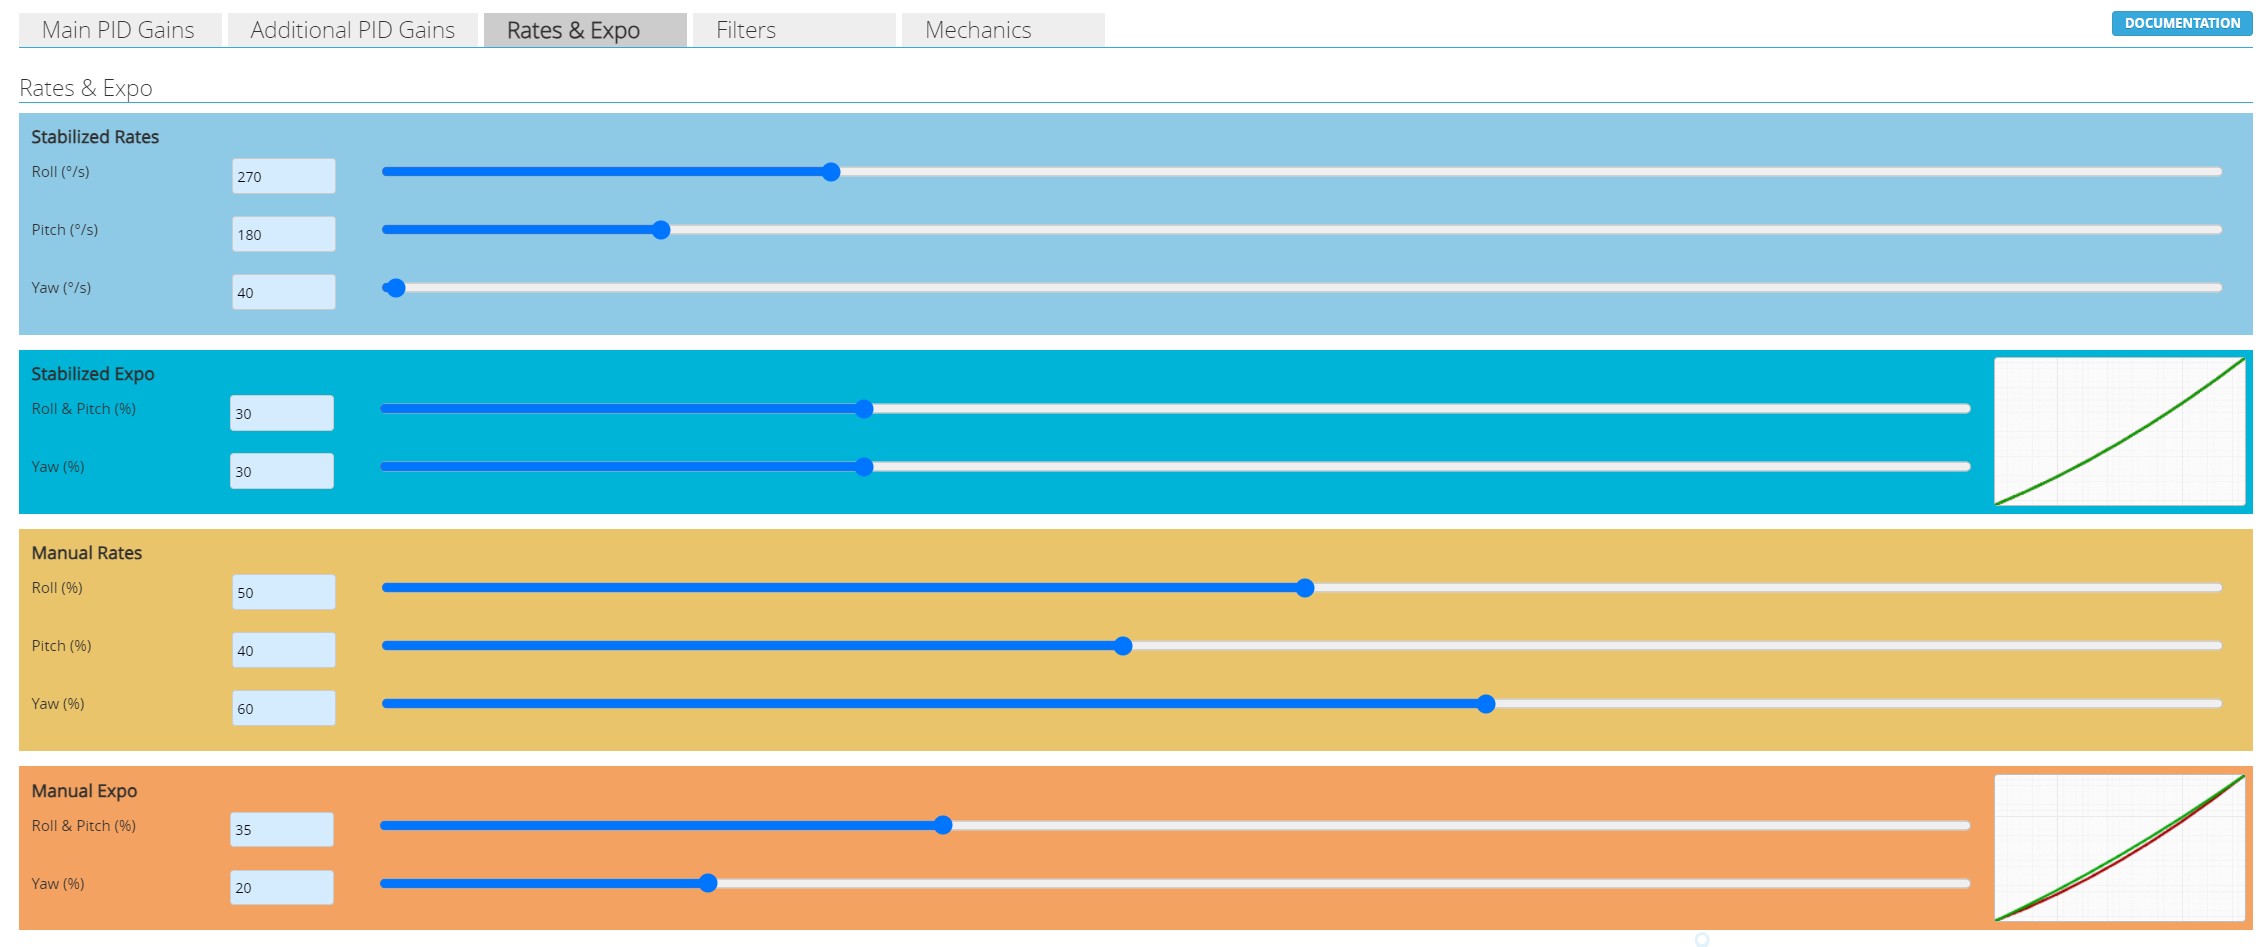
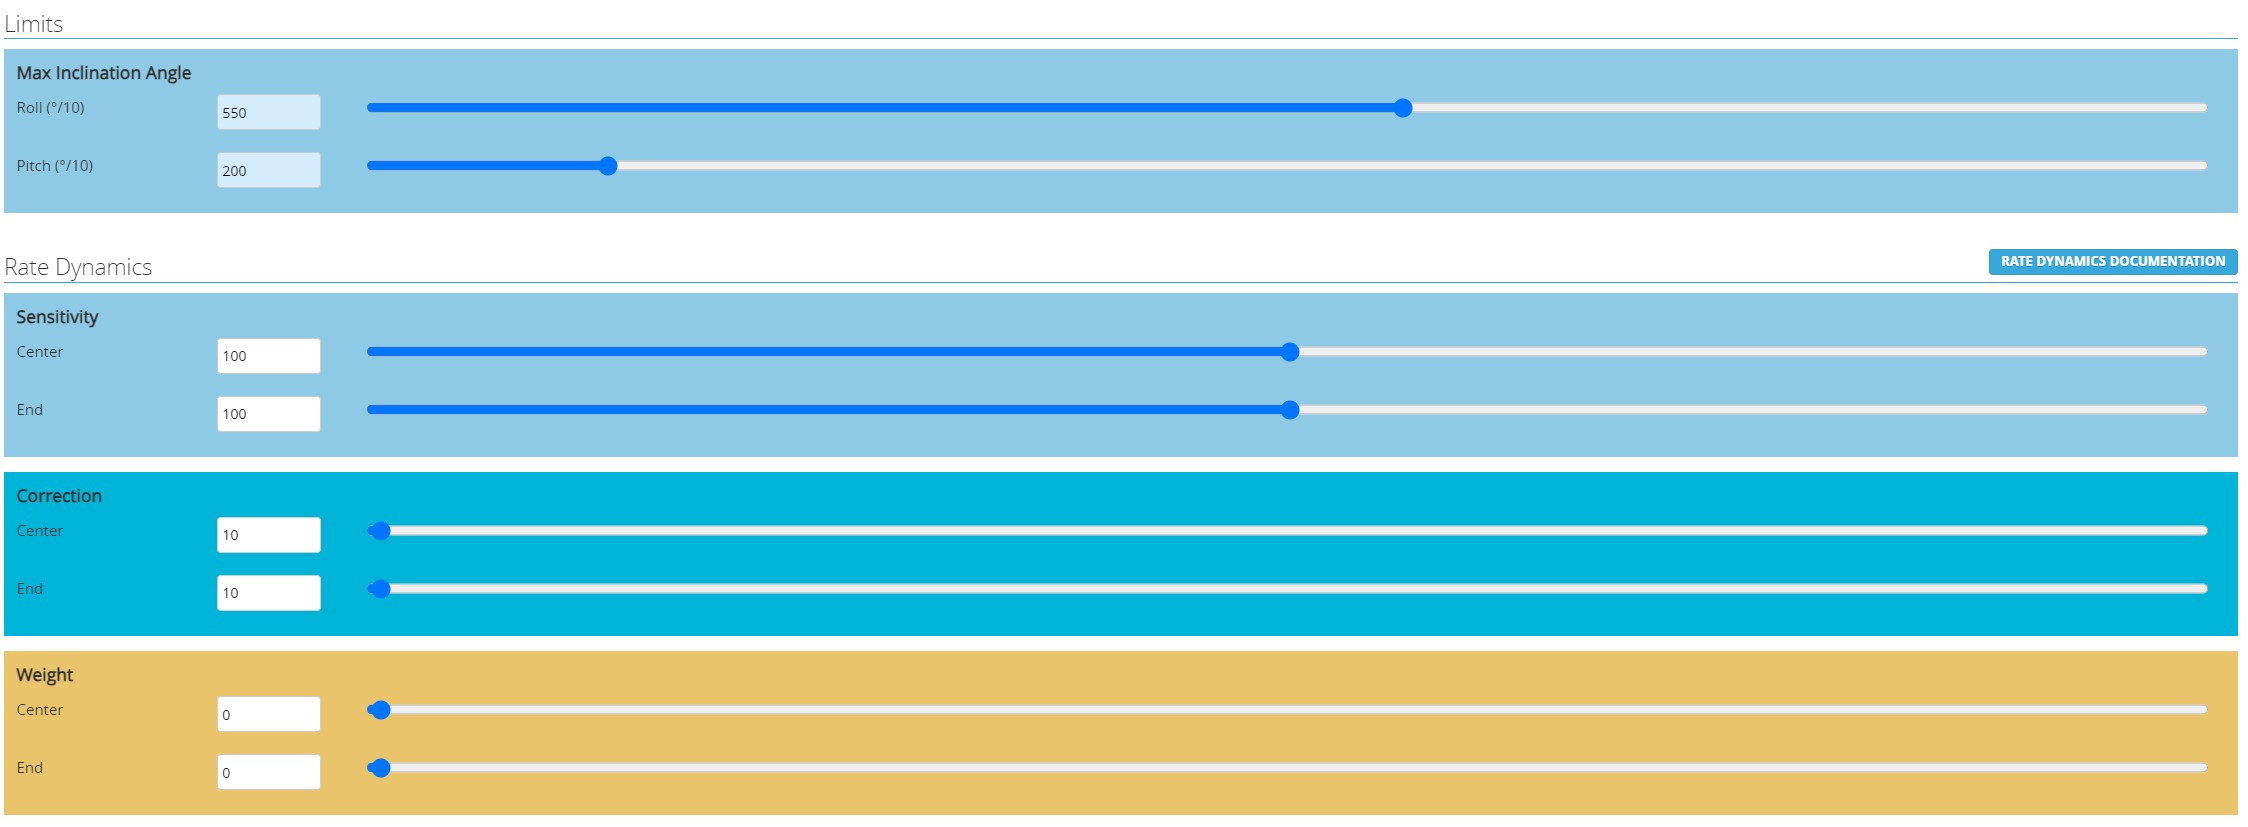
 Rates:
 Filters

-
Receiver I use ELRS receiver, so CRSF protocal is selected
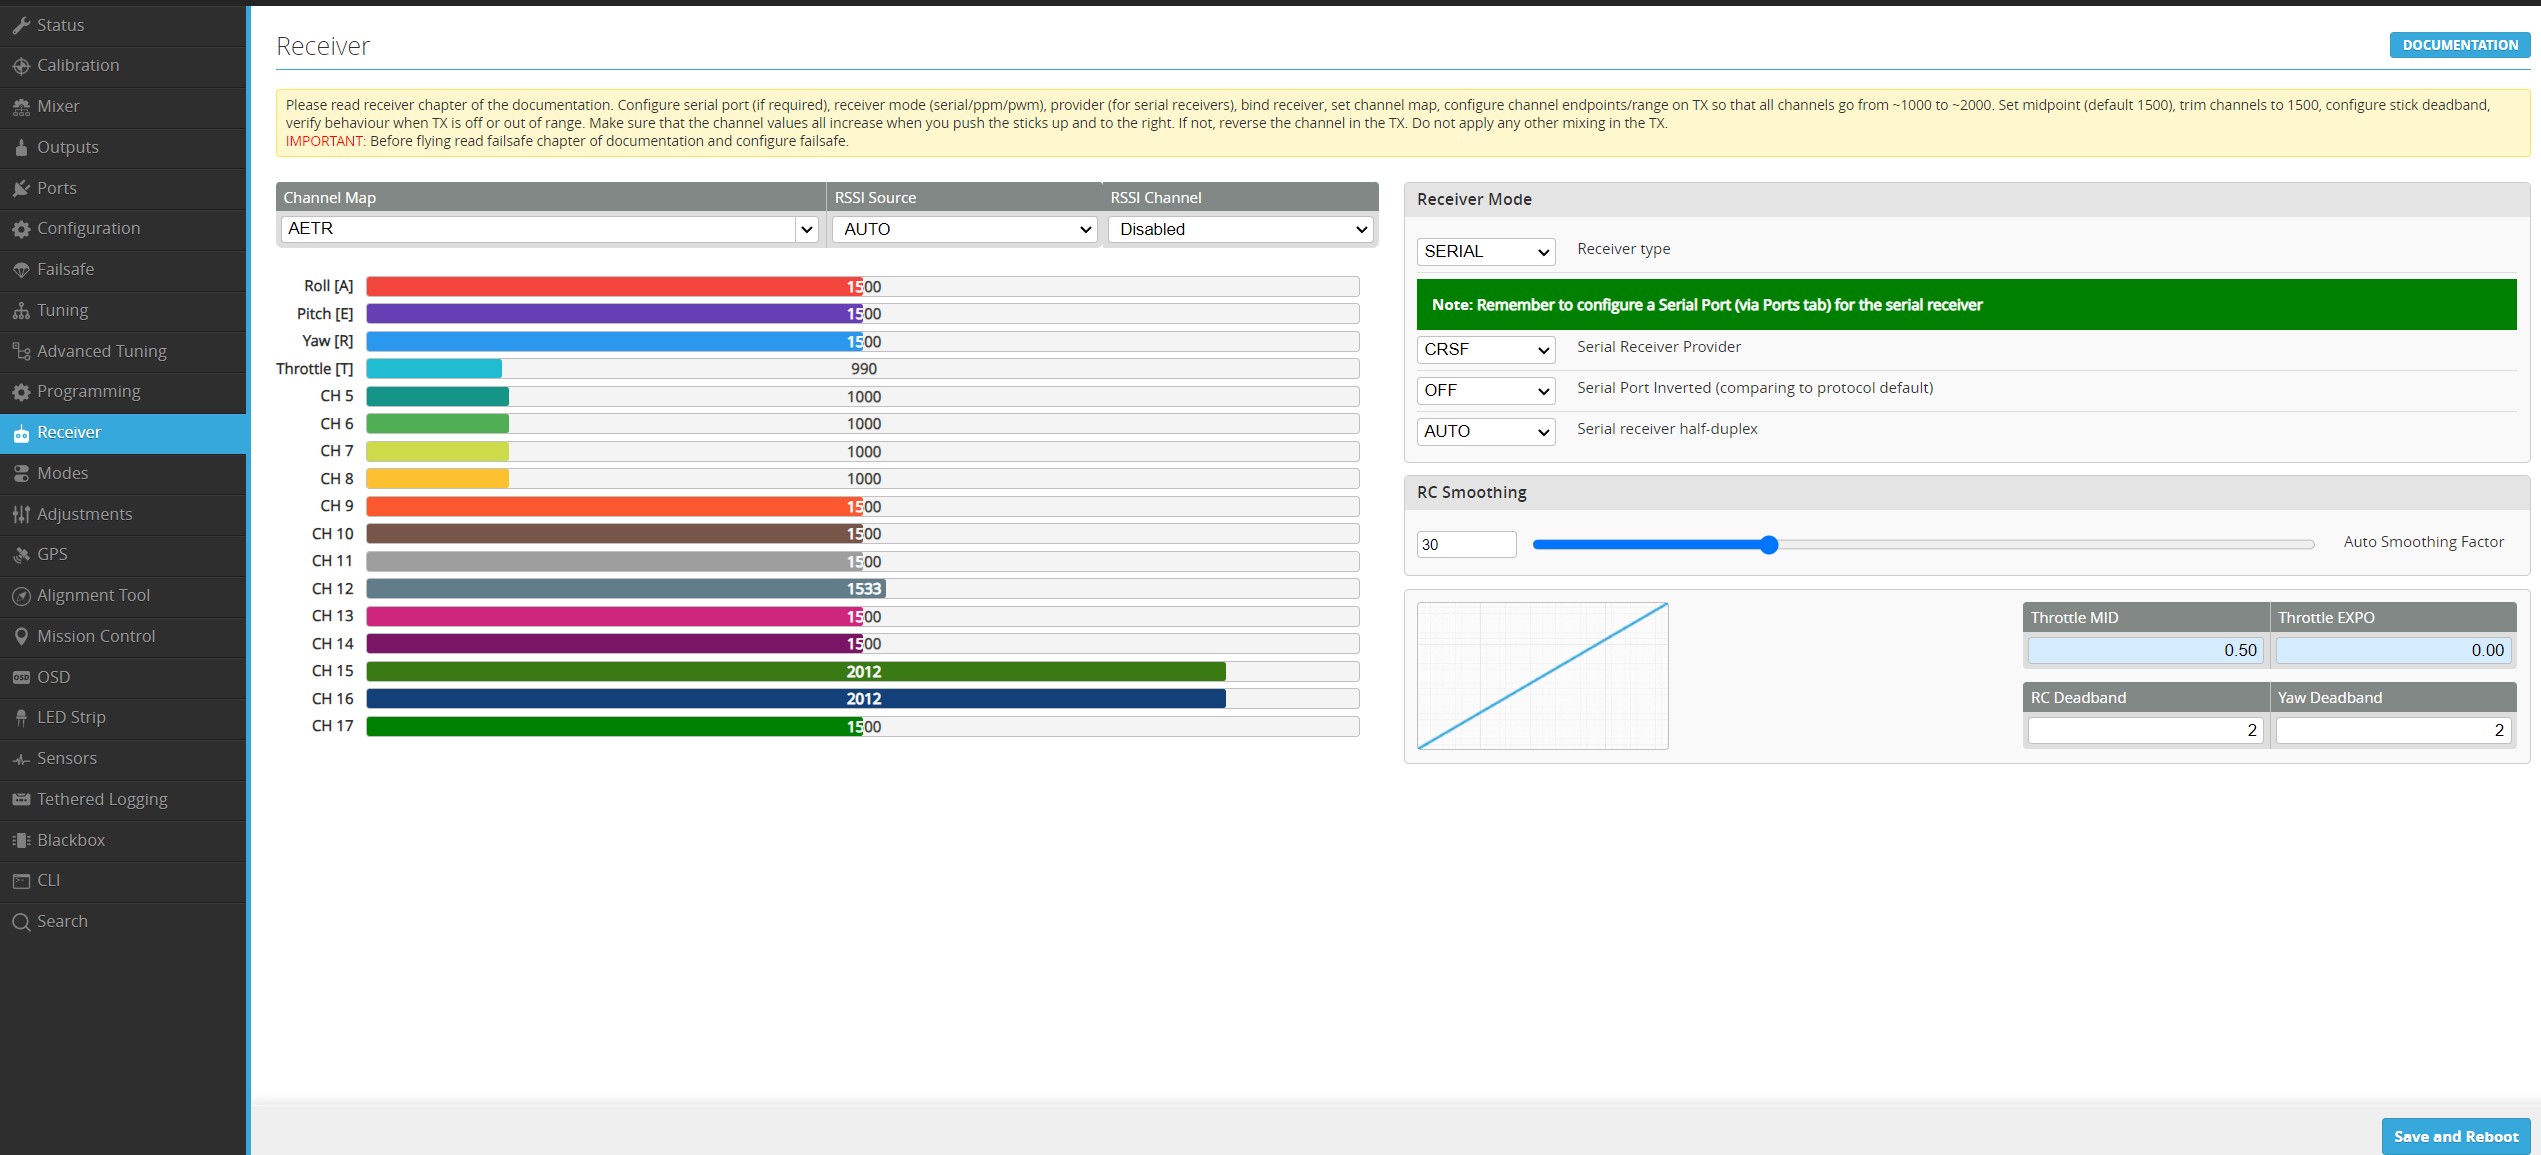
-
Modes I use HORIZON RATE and Manual mode